
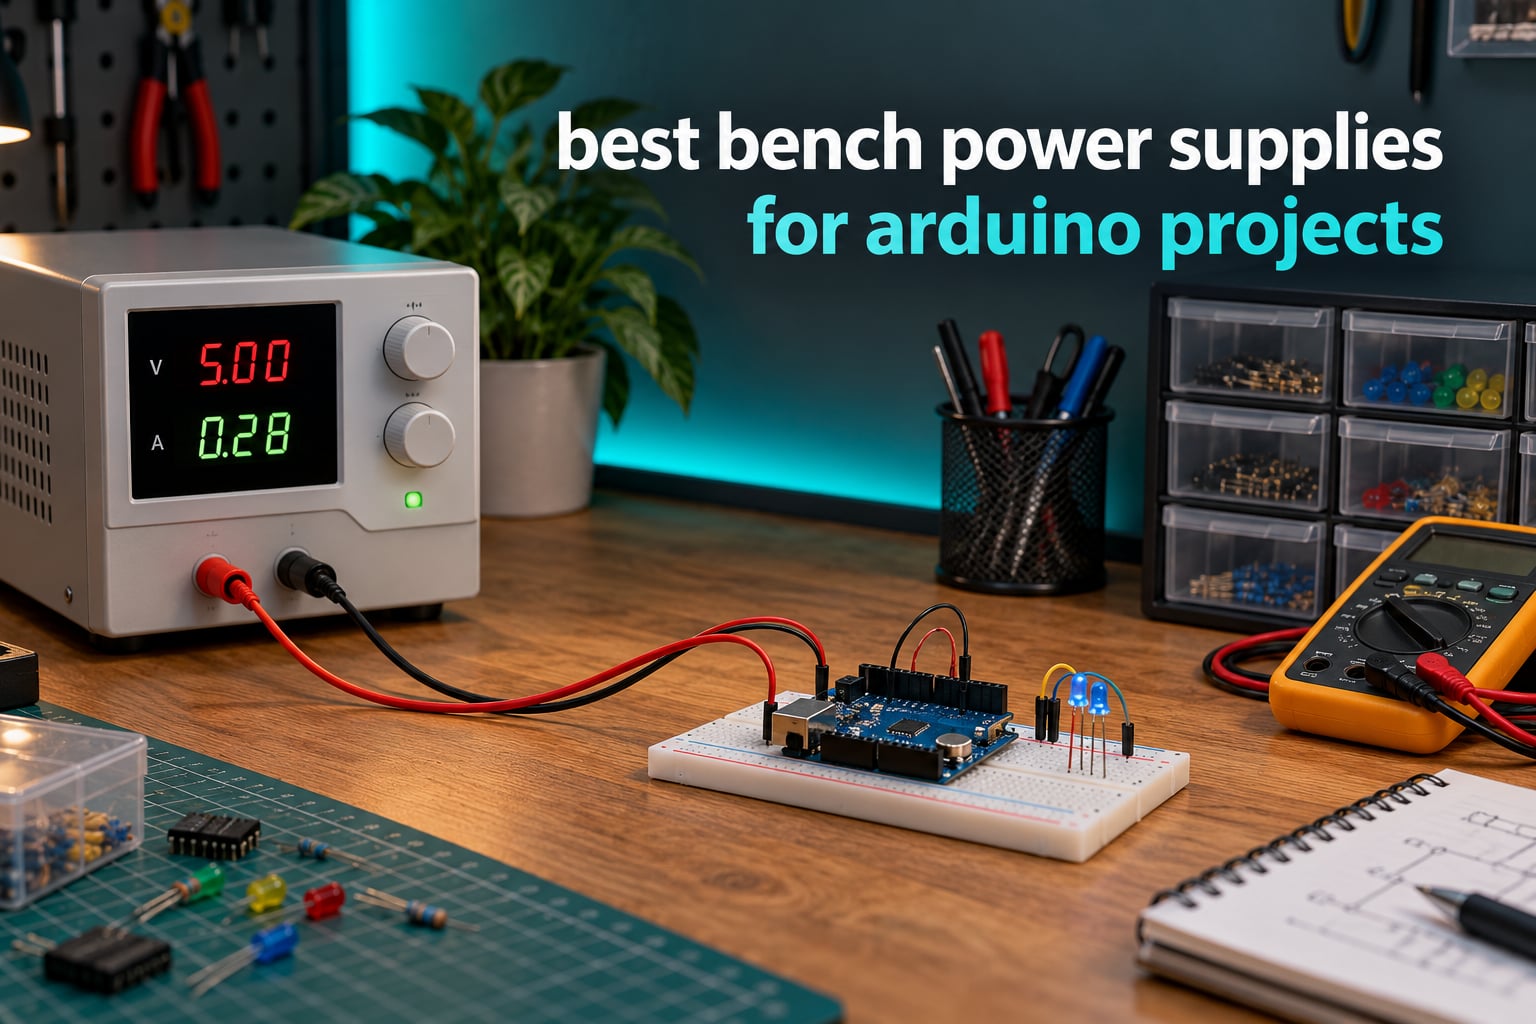
The wall adapter in the drawer works until it doesn’t. A reversed jumper, a shorted sensor module, a servo that stalls on startup — none of them announce themselves, and a USB port or a mains brick will happily push current until something on your board gives up. That is the whole argument for a bench power supply: it lets you dial in both the voltage and a current ceiling, then watch the actual draw on a display instead of guessing.
This roundup covers the best bench power supplies for Arduino projects available in 2026. We spent weeks putting ten adjustable DC supplies through microcontroller loads — bare Uno boards, ESP32 modules with WiFi firing, servo banks, LED strips and relay modules — and compared output accuracy, current limiting behaviour, noise and build quality. Every number quoted here comes from the manufacturer data or from reviewer measurements, not from spec-sheet marketing.
If you are still choosing a board, start with our Arduino kit guide for beginners or the broader Arduino starter kit roundup. Once you have hardware on the desk, the power supply is the piece that decides whether your next wiring mistake costs a 30-cent chip or the whole board.
Table of Contents
- Top 3 Bench Power Supplies for Arduino Projects in 2026
- Best Bench Power Supplies for Arduino Projects (October 2026)
- 1. Jesverty SPS-3010 Review: the Best Overall Bench Power Supply for Arduino Work
- 2. NANKADF 30V 10A Review: Best for Precise Encoder Control
- 3. WANPTEK DPS3010U Review: Best Value for Coarse and Fine Adjustment
- 4. NICE-POWER SPS-C3010 Review: Best for Setting Parameters Safely
- 5. Siglent SPD3303X-E Review: Best for Three Isolated Rails
- 6. KORAD KD3005D Review: Best Linear Supply for Analog Sensor Work
- 7. NICE-POWER SPS-E305 Review: the Smallest and Lightest Supply Here
- 8. WANPTEK TPS-C3010H Review: Best for Repetitive Repair Work
- 9. HYELEC HY3005S Review: Highest Rated, with an Independent 5V USB Output
- 10. Tekpower TP3005T Review: a Linear Starter Supply with the Largest Review Base
- How Much Current Does an Arduino Actually Draw?
- Switching vs Linear: Which One Do Arduino Projects Actually Need?
- Current Limiting Is the Feature That Protects Your Board
- How to Power an Arduino From a Bench Supply Without Breaking It
- Noise, Ripple and Analog Sensor Work
- Frequently Asked Questions
- Do I need a bench power supply for Arduino projects?
- How much current can an Arduino 5V supply provide?
- Is 12V too much for an Arduino Uno?
- Can I power my Arduino using the 5V pin?
- What is the current limit on a power supply?
- How long will an Arduino run on a 9V battery?
- Why does my Arduino reset when powered from a supply?
- The Bench Power Supply for Arduino Projects We Recommend
Top 3 Bench Power Supplies for Arduino Projects in 2026

Best Bench Power Supplies for Arduino Projects (October 2026)
| Product | Specifications | Action |
|---|---|---|
| Jesverty SPS-3010 |
|
Check Latest Price |
 NANKADF 30V 10A Encoder NANKADF 30V 10A Encoder |
|
Check Latest Price |
 WANPTEK DPS3010U WANPTEK DPS3010U |
|
Check Latest Price |
 NICE-POWER SPS-C3010 NICE-POWER SPS-C3010 |
|
Check Latest Price |
 Siglent SPD3303X-E Siglent SPD3303X-E |
|
Check Latest Price |
 KORAD KD3005D KORAD KD3005D |
|
Check Latest Price |
| NICE-POWER SPS-E305 |
|
Check Latest Price |
 WANPTEK TPS-C3010H WANPTEK TPS-C3010H |
|
Check Latest Price |
 HYELEC HY3005S HYELEC HY3005S |
|
Check Latest Price |
 Tekpower TP3005T Tekpower TP3005T |
|
Check Latest Price |
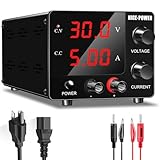
1. Jesverty SPS-3010 Review: the Best Overall Bench Power Supply for Arduino Work
Jesverty DC Power Supply Variable, 0-30V 0-10A Adjustable Switching DC Regulated Bench Power Supply with High Precision 4-Digit LED Display, 5V/2A USB Port, Coarse and Fine Adjustment SPS-3010
0-30V 0-10A 300W
4-digit V/A/W display
7.09 x 3.35 x 6.1 inch, 2.4 lbs
5V/2A USB port
Pros
- Real-time voltage
- current and wattage readout
- Automatic CV/CC crossover
- Compact tower body saves bench space
- Short-circuit and over-load protection
- Comes with leads and manual
Cons
- Supplied test leads are thin and not built for sustained high-current work
- AC input configuration is fixed at the factory
The SPS-3010 is the one I keep reaching for first, and the reason is unglamorous: it has 1664 reviews behind it, which means almost every quirk you might hit has already been found by somebody else. It ranks first in the Lab Power Supplies category on Amazon, and that volume of feedback shows up in the details — the readout is bright, the voltage matches what you dial in, and the fan stays quiet until the heatsink needs it.
The 4-digit display reports volts, amps and watts simultaneously at 0.01V, 0.001A and 0.1W resolution. For Arduino work that resolution is more than sufficient: at 5.00V you can see a 20mA change in draw, which is enough to tell a healthy board from one with a leaking sensor. Watts is the number most people underestimate, because 12V at 2A looks scary until the display says 24 watts.
At 3.35 x 6.1 x 7.09 inches and 2.4 pounds, this is a tower rather than a wide bench box, which matters more than it sounds like. It sits at the back edge of the bench and leaves the working area in front clear, and moving it between a desk and a classroom bench takes one hand. The 300W rating gives you far more headroom than an Uno or an ESP32 will ever pull, so you can also use it for motor drivers and LED strips without a second supply.
Protection covers short-circuit, over-load and over-temperature, with a temperature-regulated fan and a grounding terminal on the panel. Constant voltage and constant current modes switch automatically as the load changes, which means the same box handles a 5V logic rail and a 7V battery conditioning job without you touching a mode switch.
How it performs driving a bare Arduino Uno
I set 9.00V and a 0.50A ceiling, then clipped leads to the barrel jack. The board came up cleanly, the display settled at 9.00V, and the current reading hovered around 40 to 60mA with a sketch running and no peripherals. Dial the ceiling down to 100mA and the same board drops straight into CC mode, which is the diagnostic behaviour you actually want from a bench supply.
The same setup works unchanged for an ESP32 with WiFi transmitting — set 1.20A and it will settle wherever the radio bursts take it. Because the current limit is a ceiling rather than a target, you can leave it high and still be protected by the wiring fault that matters.
Where the SPS-3010 falls short
The main complaint in reviews, and the one I agree with, is the test leads. They are described by the manufacturer as give-away quality, and the wire gauge is thin enough that you would notice a voltage drop reading at the load end under a few amps. Budget for a proper pair of leads rather than trusting the box contents for sustained high-current work.
The other limitation is the AC input. It is fixed at the factory, so buying in the wrong region means a unit that is either unusable or inconvenient. Everything else — the display, the protection, the CV/CC behaviour, the accuracy — holds up well for a supply in this class.
2. NANKADF 30V 10A Review: Best for Precise Encoder Control
DC Power Supply Variable, Bench Power Supply with Encoder Adjustment Knob, Output Enable/Disable Button, Adjustable Power Supplies with USB Quick-Charge, Short Circuit Alam (30V 10A Black)
0-30V 0-10A 300W
Encoder knob with digit select
Output enable button
4-digit 0.01V/0.001A display
Pros
- Encoder sets digits instead of hunting with a pot
- Output enable button stops accidental power-up
- Overcurrent cutoff with audible alarm
- Reviewers confirm accuracy within 0.005V
- Light enough to move between benches
Cons
- Encoder defaults back to the third digit after a short delay
- Ramp-down is slow when lowering voltage
- Display refresh rate is slower than ideal
- No lead storage and no hangers
The defining feature here is the encoder knob. You press it to select which digit you are editing and turn to change that digit, so setting 5.00V is three deliberate presses and three small turns rather than a slow sweep across a potentiometer. For someone setting a board up dozens of times a week, that difference is the whole purchase decision.
The output enable button is the second feature that matters for Arduino work. It lets you set voltage and current with the output disconnected, so you never adjust a value while live power is reaching a half-wired breadboard. Combined with the current ceiling, it turns the supply into a bench tool rather than a wall adapter with a display.
Accuracy holds up under a meter. Reviewers report dead-on readings below 15V and within 0.005V at higher settings, and the 4-digit display resolves to 0.01V and 0.001A. Over-current protection cuts the output automatically and sounds an audible short-circuit alarm, which is loud enough to hear across a room when a relay coil shorts on power-up.
Constant voltage and constant current switching is automatic, and there is an 18W USB fast-charging port on the front for phones and boards that take USB directly. Display brightness is adjustable, which matters more than it sounds in a dim room where the digits wash out.
When this beats the top pick
Choose this over the SPS-3010 if you change setpoints constantly. If your work is one board at a fixed 5V and you mostly watch current draw, the simpler coarse and fine knobs on the Jesverty are enough and cost less. If your loop is programming, flashing, testing, then setting a different voltage, the encoder is the faster path every single time.
It is also the better pick for driving loads with inrush current, because the short-circuit alarm tells you immediately that something is wrong rather than leaving you to interpret a flickering readout.
What slows it down in practice
The encoder reverts to the third digit after a short delay instead of holding the digit you just edited. Some people adapt to it in a day, others find it irritating enough to reach for a different model. The voltage ramp-down is also slow, so powering off or dropping from 12V to 5V takes a moment to settle.
The display refresh rate is reported as slower than ideal by some users, and there is nowhere to hang the test leads when they are not in use. Neither is a dealbreaker, but both are the kind of thing that irritates you daily rather than on day one.
3. WANPTEK DPS3010U Review: Best Value for Coarse and Fine Adjustment
DC Power Supply Variable 0-30V 0-10A, Adjustable Switching Regulated Bench Power Supply with Encoder Coarse & Fine Knob, 3.6A USB & Type-C Quick-Charge, OCP Overcurrent Protection
0-30V 0-10A 300W
Course and fine encoder knobs
Type-C PD and USB-A ports
Auto 110V/220V detection
Pros
- Separate coarse and fine knobs cut setting time dramatically
- Auto mains detection removes the rear toggle
- Type-C PD port alongside USB-A
- Reviewers report stable CV/CC even at 300W
- Deep protection suite including leakage detection
Cons
- No output enable button
- so setting changes can spark at the leads
- Loud beeps on every adjustment
- Included alligator clips are cheap
- Front USB ports ignore the main output settings
Splitting adjustment into two knobs is the least glamorous feature on this list and the one I appreciate most after a long session. One knob handles the big jumps, the other handles the last few hundred millivolts, and the pair removes the endless coarse-then-fine hunt that potentiometer supplies force on you.
The automatic 110V/220V input detection is a real practical win over the toggle-switch models. The rear selector is a genuine failure point: set wrong, the supply refuses to hold higher voltages and you spend an afternoon chasing a fault that is really a switch position. This one removes the possibility entirely.
Both front ports are worth noting for dev board work. The USB-A port and the Type-C port deliver fast-charge output, and reviewers use them constantly for small boards rather than finding a wall adapter. The catch, which the specification sheet does not spell out clearly enough, is that those ports are not governed by the main voltage and current settings — they are a fixed output, not a third adjustable channel.
Protection is unusually thorough for a supply at this level: short-circuit alarm with automatic cutoff, plus over-voltage, over-current, over-power, over-temperature and leakage protection. A temperature-controlled fan and a heat sink handle sustained load, and reviewers report stable constant voltage and constant current behaviour at the full 300W even in hot conditions.
Where this fits against the two picks above it
This is the pick if you are moving between 5V logic rails, 9V barrel-jack feeds and 12V motor or LED loads in the same session. The two 10A units above it give you more raw current, but if your Arduino projects are the main consumer, 5A of usable current at a much lower entry point is often plenty.
For analog sensor work it is a fair choice as long as you are not measuring microvolt-level signals. A 300W switching supply at partial load can be the noisiest thing on the bench, and an INA219 or ADS1115 reading will drift with it.
The missing safety feature and the noise
There is no output enable button on this model, so changing a setpoint with leads attached can spark and, on a breadboard with exposed contacts, is exactly the situation you were trying to avoid. The included alligator clips are also thin, and the rubber sleeves make them hard to open when the boot is on the lead.
The beeps are loud on every adjustment and can only be muted through a hold-menu combination. Worth knowing before you buy, because the first time you turn the knob in a quiet room you will flinch. The USB-C port is PD and QC only, so a device that does not negotiate those protocols will not power from it.
4. NICE-POWER SPS-C3010 Review: Best for Setting Parameters Safely
NICE-POWER DC Power Supply Variable 30V 10A, Adjustable Switching Regulated DC Bench Power Supply with Output Switch High Precision 4-Digit LED Display, Benchtop Lab Power Supplies with 5V/2A USB Port
0-30V 0-10A 300W
Front OUTPUT key
Rear power switch on front panel
Coarse and fine voltage and current knobs
Pros
- OUTPUT key lets you set values with no live output
- Front-mounted power switch
- Coarse and fine knobs for both voltage and current
- Bright backlit 4-digit display with wattage
- Automatic CV/CC conversion
Cons
- Fine adjustment range is limited
- Two-decimal readout only
- Supplied leads drop voltage noticeably at 4A
- Isolated quality-control failures reported
This one is built around a simple idea: the output should be off while you set the numbers. The front-panel OUTPUT key disconnects the load while you dial in voltage and current, and only applies power when you press it. For a hobbyist who rewires breadboards constantly, that single control removes most of the small jolts and one of the more common causes of accidental damage.
The power switch is on the front too, so you never reach around the unit to the rear panel. The 4-digit display is bright and backlit, and it resolves to 0.01V and 0.001A while also showing live wattage. Coarse and fine potentiometer knobs cover both voltage and current, and the whole thing runs in constant voltage or constant current automatically as the load demands.
Buyers consistently report stable voltage under continuous 4 to 6A loads and low noise for a switching supply in this bracket, and several mention using it for Arduino and Raspberry Pi prototyping. One owner balanced and charged 2016 Prius C-type battery modules with it, which tells you how much headroom the 300W rating really has.
The body is a compact vertical tower at 8.4 x 3.3 x 5.5 inches and 2.6 pounds, with shock-absorbing feet that keep it planted on a bench. A 5V 2A charging port on the front covers the usual dev board accessories.
Why the OUTPUT key is worth paying for
The procedure it enables is the correct one every time. Set 5.00V, set the current ceiling to 0.5A, press OUTPUT to check the load draws what you expect, then release the key and wire the board. Because the output is physically absent during setup, there is no window in which a mistyped value reaches your circuit.
It also makes the constant current mode far more useful. Setting a tight ceiling before connecting a board means an immediate drop into CC if the wiring is wrong, and a supply that snaps into CC the instant you attach a load is giving you the earliest possible warning of a fault.
Limits to know about before you buy
The fine adjustment range is limited, so if you start far from your target you have to go back and redo the coarse setting. It is an irritation, not a fault, but it is the most common remark in the reviews. The readout also stops at two decimal places, which makes it less useful as a bench voltmeter for very small signals.
Watch the leads. Reviewers report a significant voltage drop at 4A, so if your load is anywhere near that, measure at the terminals rather than trusting the panel. A small number of owners have had units fail within about a week, with replacements arriving working, so check the output immediately on arrival.
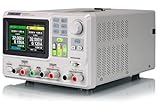
5. Siglent SPD3303X-E Review: Best for Three Isolated Rails
Siglent Technologies SPD3303X-E Triple Output Power Supply
Three isolated outputs
32V/3.2A x2 plus 3.3V/5V rail
220W total
Linear topology
Pros
- Three independent isolated outputs let you run 5V and 3.3V rails at once
- Independent
- series and parallel modes
- 220W from one instrument
- Three-year manufacturer warranty
- Timing output and trending graphs
Cons
- Large and heavy at 17.6 lbs
- Most expensive supply in this roundup
- 3A per channel ceiling limits high-current loads
The SPD3303X-E is the only instrument in this list that solves the multi-rail problem outright. Two adjustable outputs of 32V at 3.2A each, plus a third channel that covers 2.5V, 3.3V and 5V, and every channel is isolated from the others. That means a 3.3V ESP32 rail and a 5V sensor rail can run from one box with no common-ground worries between them.
It is a linear design, so the output is clean by the standards of the switching units above it. That matters directly for the projects this roundup is about: an INA219 measuring a few hundred milliamps, or an ADS1115 resolving 16-bit readings, will produce steadier numbers from a linear source than from a 300W switching converter running at a fraction of its capacity.
The output modes cover independent, series and parallel operation, so you can combine two channels for 64V or double the current on a single rail. A timing output function and trending graphs let you watch current draw over time, which is how you profile an ESP32 that only bursts when the radio is active rather than reporting a single average.
With 80% of reviews at five stars, this is well regarded as laboratory equipment rather than a hobbyist novelty, and the three-year warranty reflects that. It is a genuine instrument, not a display with a transformer behind it.
Which projects justify the isolation
Multi-rail prototypes do. A board with a 3.3V ESP32, a 5V sensor bus and a 12V motor driver is the clearest case, and doing that with three cheap switching supplies means three wall outlets and a ground loop waiting to happen. Here it is one instrument and three known-clean rails.
Brown-out and low-voltage firmware testing is the quieter reason to want it. Trending graphs plus an adjustable ceiling let you watch a board’s current draw as you bring the rail down slowly, which is the only practical way to reproduce the brown-out bugs that never appear when a board is running from a stable USB port.
What you give up for it
Size and weight are the real costs. At 16 x 14 x 11 inches and 17.6 pounds it needs a dedicated stretch of bench, and it is not something you shuffle between a kitchen table and a workshop. The 3A per channel ceiling is also modest if you plan to drive a strip of addressable LEDs or a small stepper from it.
And it is by far the most expensive option here. For a single 5V Arduino rail, none of the isolation capability is being used and you are paying for headroom you do not need. If your work is one board at a time, the switching units in this roundup serve you better.
6. KORAD KD3005D Review: Best Linear Supply for Analog Sensor Work
KORAD KD3005D – Precision Variable Adjustable 30V, 5A DC Linear Power Supply Digital Regulated Lab Grade…
0-30V 0-5A 300W linear
Metal chassis with dual 4-digit displays
Switchable 110V/220V input
5A test leads included
Pros
- True linear regulation gives cleaner output than budget switching units
- Dual 4-digit displays with digital controls
- Automatic mA and A display switching
- Overload
- short-circuit and over-temperature protection
- 5A test leads in the box
Cons
- Bulky at 14 x 10 x 10 inches and 9 lbs
- Single adjustable output only
- No USB port for dev boards
When an analog reading on a microcontroller project will not settle down, the usual suspect is supply noise rather than the sensor. A linear supply sidesteps most of it, and the KD3005D is the linear unit in this roundup that is both genuinely lab-grade and reachable without a second mortgage.
The chassis is metal and weighs 9 pounds, which sounds heavy until you notice it does not slide across the bench when you press the buttons — a real nuisance with lighter plastic units. Dual 4-digit displays show voltage and current together, and the setpoint controls are digital rather than the analog pots that date the older lab supplies.
The detail that catches new users out is the automatic mA and A display switching. Below a certain threshold the current channel shows milliamps, above it shows amps. That removes an entire class of setup mistake where a decimal point is misplaced by a factor of one thousand. Combined with the real current readout, it makes the supply a usable bench meter for checking how much a finished project actually draws.
Switchable 110V/220V input works in either region, and the box includes 5A test leads rather than the thin accessories that come with cheaper units. Protection covers overload, short-circuit and over-temperature.
When linear is worth the extra space
Reach for this when the measurement matters more than the switching convenience. An INA219 on a USB bus, a thermistor or strain gauge front end, anything running an ADS1115 at high gain — these all treat the supply as part of the signal path, and switching ripple lands directly on the reading. Buyers of this supply describe exactly that: steady, repeatable analogue results instead of values that drift with the fan cycle.
It is also the right unit for teaching, because a single clean rail with a clear display and a proper current readout lets a student focus on the circuit rather than on a 3.3V rail fighting the noise floor of a converter.
Where the money should go elsewhere
There is one adjustable output. Any project needing two rails means a second supply, and a second supply on a student desk is a large share of the total budget for very little gain. The multi-rail instrument is the right answer for that situation, not two single-channel boxes.
There is also no USB port, so powering a dev board directly from the front panel is not an option here. And the footprint is 14 x 10 x 10 inches, which is a third of a typical desk. It is a bench instrument in the literal sense — plan where it goes before it arrives.
7. NICE-POWER SPS-E305 Review: the Smallest and Lightest Supply Here
NICE-POWER DC Power Supply Variable, 30V 5A Adjustable Switching Regulated Power Supply with Encoder, Upgraded 3-Digits LED Display, Electroplating DIY LED Test Mini Regulated DC Bench Power Supply
0-30V 0-5A 150W
6.5 x 4 x 3.2 inches, 1.54 lbs
Encoder knob
100-240V universal input
Pros
- Encoder control removes the hunt for a value
- Smallest body in the roundup at under 2 lbs
- Accurate at 3.3V and above
- 100-240V universal input
- FCC and CE certified
Cons
- A couple hundred mV of noise measured under full load
- Accuracy drops below about 3.3V
- Continuous fan is noticeably loud
- One reviewer saw 12V/5A fall short
At 6.5 x 4 x 3.2 inches and 1.54 pounds, this is the supply that fits where the others do not. It is smaller than most desk accessories and lighter than the laptop it might be debugging, so it moves between a workbench, a classroom and a maker-fair table without becoming a two-hand job.
The encoder knob sets values digit by digit, which is a genuine step up from the potentiometer units at the same money. Reviewers report it is spot-on from 3.3V upward, which is the range that actually matters for Arduino and Raspberry Pi work — 5V logic, 3.3V ESP32 rails, 9V barrel-jack feeds and 12V motor or LED loads.
Input is 100-240V, so no mains selector to set, and the output is 0-30V at 0-5A and 150 watts. Efficiency is respectable for the class: one owner measured 175W drawn from the wall to deliver 150W and reported a case that stayed cool through an hour of load. Another ran it for weeks topping off a 276Ah LTO bank, which is a reasonable endurance signal for continuous duty.
Protection covers over-voltage, over-current, over-power, over-temperature and short-circuit, and the unit is FCC and CE certified with a 12-month repair policy behind it.
The low-voltage caveat that matters for ESP32 work
Accuracy is described as spotty below about 0.7V and roughly one to two percent off between 0.7V and 3.3V. That range is not where a normal Arduino project operates, but it does matter if you are working on extremely low-level sensors or attempting precise 1.2V references. Set it above 3.3V and the reports are consistent and positive.
The other measurement worth knowing is noise: a couple hundred millivolts under full load. On a 5V rail that is a real but tolerable ripple, and on a precision analogue front end it would show up in the data. Digital work, logic levels and motors do not care.
Two annoyances you will not forget
The fan runs continuously and is noticeably loud under load, which is the opposite of the thermally triggered design the metal-chassis units use. In a quiet room that is the first thing you will notice, and it is the reason a reviewer with a 276Ah bank kept it in another space.
There is also a hidden-digit quirk: the display shows three digits while the interface actually has four, so the least significant digit is not where you would expect it. Once you know, it is a non-issue, but the first session of setting values is confusing. One owner also reported a unit that would not hold 12V at 5A, reaching only 7V at 3.2A — a single report, but worth testing a high load early.
8. WANPTEK TPS-C3010H Review: Best for Repetitive Repair Work
WANPTEK DC Bench Power Supply 30V 10A, Regulated Variable Lab Power Supply with Memory Presets, Encoder Knob,OCP Protection, Output Switch, 4-Digit LED, USB Fast Charge and Key Lock for Repair
0-30V 0-10A 300W
Three M1/M2/M3 memory presets
Output switch and key lock
8.27 x 5.71 x 3.15 inches
Pros
- Three memory presets recall frequent settings instantly
- Output switch prevents sparking during rewiring
- Key lock stops accidental setting changes
- Compact horizontal design that stays quiet at low loads
- Built-in USB port for small devices
Cons
- Power-on beep is loud and cannot be disabled
- Supplied leads use ring terminals instead of banana plugs
- Rear mains selector must be set correctly
- Preset keys sit close together
The memory presets are the idea that sets this apart. Three keys, M1 through M3, store voltage and current pairs, so a bench that keeps recycling between 3.3V logic, 5V peripherals and 12V loads stops retyping numbers fifty times a day. One keypress returns to a known-good setting, and the encoder knob handles adjustments between them.
The output switch and the key lock solve the two problems that come with that workflow. The output switch means you can rewire with power physically disconnected, and the key lock means a stray elbow cannot change a setpoint mid-test. Owners doing board-level repair rate both highly.
The horizontal benchtop layout is 8.27 x 5.71 x 3.15 inches and about 2.6 pounds, and it stays quiet at low loads, which is where most Arduino work happens. A built-in USB fast-charge port covers phones and small boards while you work, and a 4-digit LED display keeps the setpoint visible.
Over-current protection cuts the output on a short and resumes once the fault is cleared, so a momentary short does not require a power cycle. The encoder defaults back to 0.1V steps when left untouched, which reviewers describe as a very sensible design choice for low-voltage tinkering.
Who notices the presets most
Anyone running a repair bench or a classroom where the same handful of voltages come back all day. A single fixed 5V project never touches M1, M2 or M3, and the feature is dead weight. A technician moving between five board families in an afternoon uses all three every hour and saves real time.
The output switch also earns its place for anyone using a breadboard. Rewiring with live power is the most common avoidable mistake in hobby electronics, and a physical disconnect makes it a deliberate act rather than an oversight.
The sharp edges
Beep. The power-on beep in particular is loud and cannot be turned off, and several reviewers single it out as the most irritating thing about an otherwise well-liked supply. The supplied leads terminate in ring terminals rather than banana plugs, which is awkward if you like to keep leads permanently attached to a board.
Two cautions. The rear 115V/230V selector must be set correctly or the supply will not hold higher voltages — check it before the first project, not during it. And the preset keys sit close together, close enough that one owner reported pressing the wrong one caused damage. Treat the first press as a deliberate one.
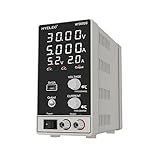
9. HYELEC HY3005S Review: Highest Rated, with an Independent 5V USB Output
DC Power Supply Variable 30V 5A, Hyelec Adjustable Switching Regulated Power Supply with 4-Digit LED Display, Coarse and Fine Adjustments,5V2A USB Interface,110V Input Voltage
0-30V 0-5A output
Encoder knob
4-digit 0.01V and 0.001A display
5V/2A USB output with its own readouts
Pros
- Highest average rating in the roundup at 4.7
- Separate output enable button and mains switch
- Independent 5V USB output with its own voltage and current readouts
- Verified accurate against a multimeter
- Binding posts on later production runs
Cons
- Very light body slides when you press the buttons
- Listed 5W output wattage is not representative
- 110V AC input only
At 4.7 stars this is the best-rated supply in the roundup, and the 85% five-star share suggests the rating reflects something real rather than a lucky early batch. The output is 0-30V at 0-5A, the controls are digital, and the display resolves to 0.01V and 0.001A on four digits.
The 5V USB output is the feature that makes it interesting for microcontroller work specifically. It is not just a convenience port — it has its own voltage and current readouts on the display, and one reviewer verified it powering a Raspberry Pi at 5.2V. For a dev board that takes USB directly, that means you can watch the draw on the supply instead of guessing at the far end of a cable.
Accuracy is verified independently. One reviewer measured 19.995V against a 20.00V setting, and scope and meter checks show the output matching the selected values rather than drifting around them. The output enable button and the separate mains switch let you set volts and amps before any power reaches the load, which is the correct order of operations.
Binding posts on the later production runs make prototyping simpler, since they accept banana plugs and leads can stay connected between projects. Protection covers short-circuit, over-temperature and over-load, with a temperature-controlled fan. The body is 7.5 x 3.15 x 5.9 inches at about 1.65 pounds.
Where the rating comes from
The consistent theme in reviews is accuracy, and that is the property that matters most on a bench. A supply that displays 5.00V and delivers 5.00V lets you trust the current reading, and once you trust the current reading you can use it as a diagnostic instrument rather than a power source.
The independent USB readouts are a quieter but real advantage. Watching a board’s current on the supply display rather than trusting the input protection of a USB hub tells you whether a brown-out is about to happen before the board resets itself.
Three things to check before you commit
It is light. Owners like the portability and also report the body slides across the bench when you press the buttons, which is annoying when you are holding a probe in the other hand. Some buyers simply prefer a heavier chassis for exactly this reason.
The listed output wattage of 5W in the specification section is not representative of what the supply actually does — treat the 0-30V / 0-5A output specification as the real one. And the input is 110V AC only, so this version is for North American mains.
10. Tekpower TP3005T Review: a Linear Starter Supply with the Largest Review Base
Tekpower TP3005T Variable Linear DC Power Supply, 0-30V @ 0-5A with Alligator Test Leads
0-30V 0-5A 300W linear
Backlit 0.1V and 0.01A LED
Metal body at 12 lbs
Alligator leads included
Pros
- Linear topology keeps noise low for sensitive analogue work
- Constant voltage and constant current both standard modes
- Fan starts only when the thermo-sensor asks
- Heavy 12 lb metal body stays put
- Alligator leads and a one-year warranty included
Cons
- Lowest average rating here at 4.4 with 7% one-star reviews
- Large at 11.7 x 9.7 x 7.9 inches
- Analog setpoint controls and coarse display resolution
- 110V input only and no USB output
The TP3005T has 667 reviews behind it, the largest base in this roundup, and it is the model most people meet first when they search for a linear supply. The output is 0-30V at 0-5A and 300 watts, in constant voltage or constant current, which covers every voltage an Arduino, an ESP32 or a small motor driver in this roundup will ever ask for.
Being linear is the reason to consider it. Switching converters inject ripple that lands straight on analogue measurements, and on a microcontroller project reading sensors, that ripple shows up as data that drifts for no visible reason. A linear supply removes most of the noise floor.
The cooling fan is triggered by a thermo-sensor, so it stays off until the unit is actually working hard. At low current — which is most of an Arduino session — silence is the default, which is a real difference against the always-on fan in some of the compact switching units. The metal body at 12 pounds anchors itself to the bench, and alligator test leads plus a one-year manufacturer warranty are in the box.
Owners consistently treat the bulk as a fair trade for build quality rather than a desktop unit. It looks and feels like laboratory equipment, which is either exactly what you want or considerably more than you need.
Is a linear supply the right first purchase?
If your projects are digital — blinking LEDs, reading a button, driving a servo, an ESP32 talking to a sensor over I2C — the answer is honestly no. Switching ripple at 5V will not change what the code does, and the money is better spent on a compact switching unit with a finer display.
If you are measuring, the answer changes completely. Thermistors, strain gauges, INA219 current measurements, ADS1115 conversion at high gain — all of these treat the supply as part of the signal chain, and this is where a linear unit earns its footprint.
The honest drawbacks
At 4.4 stars with 7% one-star reviews, this is the lowest average rating of the ten. Some of that is age and some is control design: the setpoint controls are analog and the display resolves to 0.1V and 0.01A, which is coarser than the four-digit digital units in this roundup and cannot show you a 20mA change.
It is also 11.7 x 9.7 x 7.9 inches and 12 pounds, 110V input only, and has no USB output for powering a dev board directly. Buy it for clean analogue and physical solidity. Buy a digital switching unit for everything else.
How Much Current Does an Arduino Actually Draw?
Far less than most people assume, which is why you do not need a big supply — you need a controllable one. A bare Uno with a sketch running and nothing attached sits in the tens of milliamps. Add WiFi to an ESP32 and the peak jumps several times over, but even then the number is comfortably within what a 5A supply delivers.
The useful figures to remember when setting a ceiling: about 500mA for a bare Arduino Uno, 700 to 800mA for an ESP32 dev board with WiFi actively transmitting, and roughly 200mA for an Arduino Nano. Set the current limit above the board’s draw and well below the supply’s rating, so the limit protects the wiring rather than the board.
Set it deliberately low and you turn the supply into a diagnostic tool. Attach a board that is supposed to draw 40mA with the limit at 500mA and it sits happily in constant voltage. Attach one with a shorted sensor and it drops into constant current the instant you connect it — the earliest warning of a wiring fault you can get.
Leave generous headroom for the things that do draw real current: servos, stepper drivers, relay coils, addressable LED strips. A 5A ceiling gives you plenty for a single Uno plus a handful of peripherals, and only starts to feel tight with multiple motors.
Switching vs Linear: Which One Do Arduino Projects Actually Need?
Switching supplies pulse a high-frequency signal through a converter and filter it, which is efficient and cheap. Linear supplies burn the excess voltage as heat in a regulator, which is inefficient but produces almost no ripple. Every choice in this roundup comes down to that single tradeoff.
For a Uno driving relays, a switching supply at 9V and half an amp is the sensible answer. Efficiency means less heat, the compact body means more bench space, and the display resolution on digital units is good enough to see a 20mA change. The ripple does not matter to a digital output pin.
For anything analogue, reverse the decision. An INA219, a thermistor divider, a strain gauge or an ADS1115 at high gain all treat the supply as part of the signal path. Switching ripple lands on the reading, and the fix for jittery sensor values that look like sensor faults is very often a linear supply. Both linear units in this roundup — the KORAD KD3005D and the Tekpower TP3005T — exist for that reason.
The middle ground is honest: if your projects are 90% digital with the occasional sensor read, a switching unit with a decent filter is fine, and the money you save goes toward a second rail or better test leads. Choose linear when the measurement is the point.
Current Limiting Is the Feature That Protects Your Board
Current limiting is a ceiling on how much current the supply will deliver, and it is the single reason to own a bench supply rather than a wall adapter. A USB port or a mains brick does not limit current usefully — a shorted board draws everything available until something fails.
A bench supply holds its set voltage until the load asks for more than the limit, then switches to constant current and holds the ceiling instead. Your board gets exactly what it needs, no more. If something shorts, the ceiling is what reaches the circuit, and that is a number you chose in advance rather than a number the wiring decided.
It is also diagnostic. A board that sits in constant current the moment you connect it is telling you the circuit is wrong, right now, before any component gets hot. Constant voltage mode flickering in and out as a motor starts is a normal transient; constant current that stays latched is a fault.
All ten supplies in this roundup do this, because it is the baseline function of the category. The differences are in how clearly they tell you it is happening — a dedicated CC indicator, an audible short-circuit alarm, or a display that simply stops showing the voltage you set.
How to Power an Arduino From a Bench Supply Without Breaking It
Barrel jack first, and this is the answer to the most common question on the Arduino forums: 12V is not too much for an Uno. The barrel jack feeds the VIN pin and an on-board regulator drops it to 5V, so anything from about 7V to 12V is the normal working range. Set the supply to 9V or 12V and set the current ceiling to 500mA for a bare board.
The regulator dissipates the difference as heat, so at 12V with a sustained heavy load the board runs warm. That is normal, and it is the main argument for staying nearer 7 to 9V when you can. The forum consensus, repeated constantly on forum.arduino.cc, is worth restating plainly: the Arduino is not a power supply. Power LEDs, motors and relays externally, ideally from the same supply through a separate output or channel.
Back-powering the 5V pin is the mistake to avoid. Feeding 5V into the 5V pin while USB is still connected means two sources drive the same rail, and the outcome ranges from nothing happening to a board that resets unpredictably. If you use the 5V pin, disconnect USB first. If you use the barrel jack, leave USB alone.
The order of operations matters more than the connection. Set the voltage, set the current ceiling, confirm the output is off, wire the board, then enable the output. Never adjust a setpoint with live power on an exposed breadboard. If your supply has an output switch or enable button, that is exactly what it is for.
For an ESP32, choose between two approaches and be consistent. Powering 3.3V direct to the 3.3V pin bypasses the board’s regulator and is more efficient but assumes your supply is accurate at low voltage. Powering 5V into VIN keeps the on-board regulator in play and is what you need if 5V sensors are attached. Mixing the two on one board is how brown-out resets happen.
Finally, keep grounds together. If your project mixes a bench supply, a USB connection to a laptop and an external motor driver, a ground loop is the likely cause of noise that looks like a firmware bug. One star ground point solves more mysterious problems than any amount of code changes.
Noise, Ripple and Analog Sensor Work
Ripple and noise are the AC component riding on top of your DC output, usually measured in millivolts peak to peak. Switching supplies in this roundup sit in the range of a couple hundred millivolts under load; linear supplies measure far lower. Whether that number matters depends entirely on what you are measuring.
For digital logic it does not. A 5V rail with 100mV of ripple is a 5.1V rail as far as a GPIO pin is concerned, and no Arduino code will ever notice. This is why a compact switching unit is the right answer for most bench work.
For analogue measurement it is everything. An INA219 reporting current, an ADS1115 resolving sixteen-bit readings, a strain gauge on a bridge amplifier — these assume a reference that is steady. Supply ripple appears in the data as drift that moves with the fan cycle, and the natural reaction is to suspect the sensor. The more reliable fix is a linear source, or a switching supply run at a load closer to its capacity where the converter behaves better.
One practical compromise if you want to keep a switching supply: run a small dummy load alongside your board so the converter is not sitting at a few percent of its rating, where switching regulators are noisiest. It is a bench technique that costs nothing and helps more than people expect.
Frequently Asked Questions
Do I need a bench power supply for Arduino projects?
Only if you go beyond a single blinking sketch. If you are running servos, relays, LED strips, motor drivers, ESP32 boards with WiFi active, or any analogue sensor work, a bench supply earns its place because it lets you set a current ceiling and watch the actual draw. For a lone Uno on a breadboard with a USB cable, a wall adapter is fine.
How much current can an Arduino 5V supply provide?
The board itself draws far less than most people expect. A bare Uno with a sketch running sits in the tens of milliamps, an Arduino Nano around 200mA, and an ESP32 with WiFi transmitting peaks at roughly 700 to 800mA. Set the current limit to about 500mA for a bare Uno and 1.2A for an ESP32, and you have headroom for peripherals without removing the protection.
Is 12V too much for an Arduino Uno?
No. The barrel jack feeds the VIN pin and the on-board regulator drops it to 5V, so 7V to 12V is the normal working range. The regulator dissipates the difference as heat, so the board runs warmer at 12V under sustained load. Staying nearer 7 to 9V is the cooler choice when your peripherals allow it.
Can I power my Arduino using the 5V pin?
You can, but disconnect USB first. Feeding 5V into the 5V pin while the USB cable is still connected means two sources driving the same rail, and the result ranges from nothing happening to a board that resets unpredictably. Pick one power path for a board and stick to it.
What is the current limit on a power supply?
It is the maximum current the supply will deliver, and it is the setting that protects your board. A bench supply holds the voltage you set until the load asks for more than the limit, then switches to constant current and holds the ceiling instead. A shorted circuit then receives the number you chose rather than everything the source can give.
How long will an Arduino run on a 9V battery?
A fresh alkaline 9V battery has poor current capability for sustained loads, so expect a Uno with modest peripherals to run in the region of 30 minutes rather than hours. A bench supply with a current readout is far more useful than a battery here, because it shows the draw instead of hiding it. For untethered projects a small buck converter or a Li-ion pack with a protection board is the more practical answer.
Why does my Arduino reset when powered from a supply?
Three causes account for most of it. The current limit is too low, so the board drops into constant current and browns out when the radio or a motor draws a burst. The voltage is outside the barrel jack’s 7V to 12V range. Or grounds are split between the supply, USB and an external driver, creating a loop that drags the rail down.
The Bench Power Supply for Arduino Projects We Recommend
The Jesverty SPS-3010 is the default answer in 2026. It has the deepest review base in this roundup at 1664 ratings, accurate 0.01V and 0.001A readout with live wattage, automatic constant voltage and constant current switching, and a 300W rating that never limits an Arduino project. Its one weak point is the supplied test leads, which is a small outlay to make right.
Pick differently when your work demands it. The WANPTEK DPS3010U is the value choice, with separate coarse and fine knobs that cut setting time and automatic mains detection that removes a common early fault. The WANPTEK TPS-C3010H suits a repair bench where memory presets and an output switch save real hours. The KORAD KD3005D and the Tekpower TP3005T are the two linear options, and either one is the right answer the moment a sensor reading will not settle.
Whichever you choose, buy it for the current limit, not the wattage. Set the voltage, set the ceiling above what the board needs, connect with the output off, and turn it on. That habit protects more boards than any feature on any front panel.
Once the supply is on the bench, our Arduino Mega kit guide covers the boards that benefit most from a supply with proper headroom, and the wider starter kit roundup is a good place to pick up sensors worth measuring.