
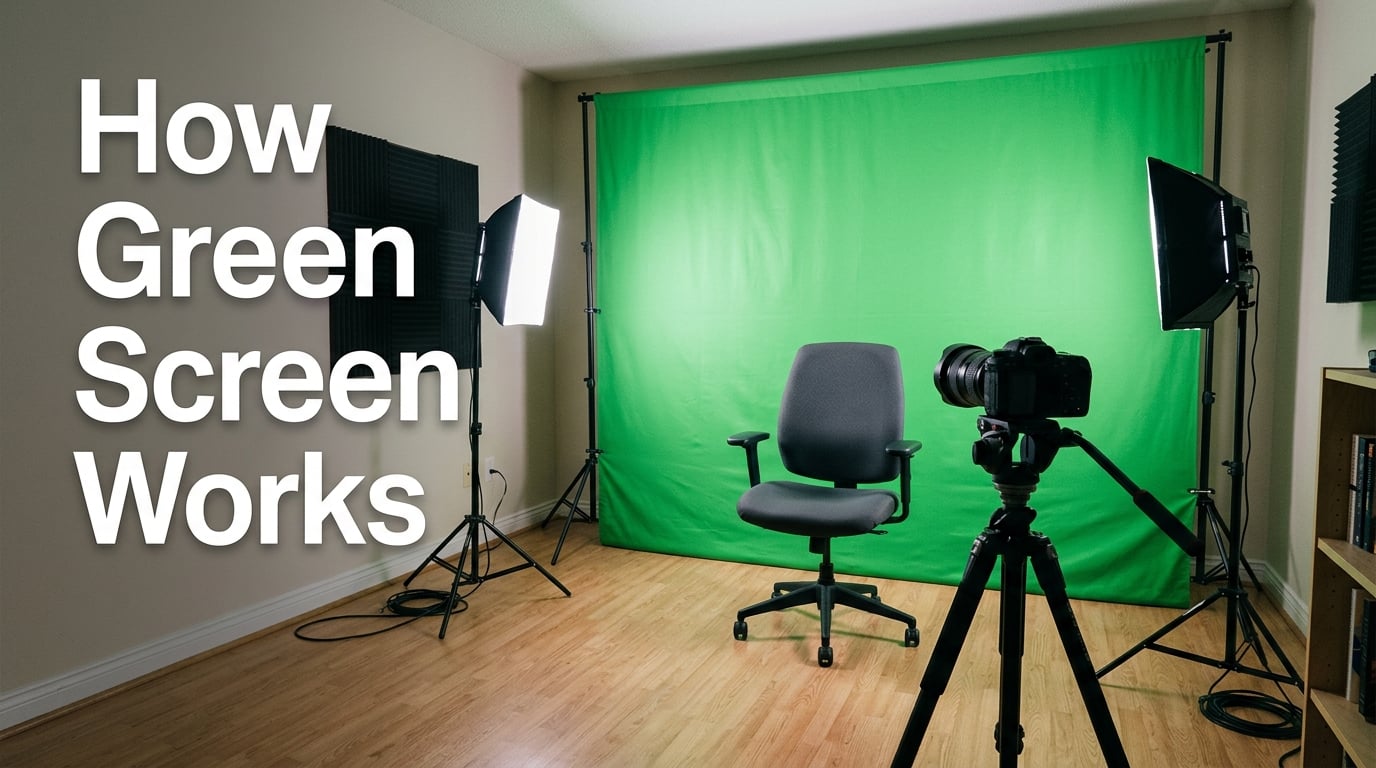
If you’ve ever watched a weather reporter stand in front of a hurricane map or seen your favorite YouTuber appear to sit on the surface of Mars, you’ve watched a green screen at work.
A green screen is a solid-colored backdrop that video software can erase in seconds, leaving room for anything else you can imagine.
I’ve spent years testing chroma key setups in home studios and small production rooms, and the technology always surprises newcomers because it feels like magic until you understand the science.
In this guide I’ll break down how green screen works from the camera sensor to the final composite, explain why the color green is usually chosen over other colors, and walk through the setup steps that separate clean keying from frustrating patchy footage.
By the end you’ll understand chroma keying well enough to set up your own screen, troubleshoot common problems, and decide what gear you actually need.
Table of Contents
What Is a Green Screen and Why Does It Exist?
A green screen is simply a flat, evenly lit, solid-green background placed behind a subject during filming, used so software can later replace that background with any image or video.
The idea is older than most people realize. In the 1930s and 1940s, filmmakers used painted blue backings for traveling mattes on black-and-white film, long before modern digital cameras.
As television and color film arrived in the 1950s and 1960s, engineers refined the technique and eventually settled on the bright, slightly bluish-green you see today. Chroma keying became a broadcast staple.
The reason a solid color is used is rooted in how computers see images. Every frame of video is just a grid of colored pixels, and software can be told, “Any pixel that is roughly this specific shade of green, make it invisible.”
When the software removes those pixels, the subject stays in place while the green area becomes a transparent window into another image. That window is the entire illusion.
Think of it like a stencil. Paint the background one color, and the computer can cut around everything that isn’t that color.
How Green Screen Works: The Chroma Key Process
Green screens work through a process called chroma keying, which means the software identifies every pixel matching the screen’s color and turns those pixels transparent so a new background can show through.
Here’s how the four key stages run in real time on most modern editing software and streaming apps.
Step 1: Identify the Key Color at the Pixel Level
As each frame comes off the camera, the software scans every pixel and asks a simple question: is this pixel close to our chosen key color?
Closeness is measured in a color space rather than a single channel. Most keyers look at the balance of red, green, and blue light in each pixel and compare it to the screen’s reference shade.
Pixels that match closely enough get marked as “background.” Pixels that don’t match are marked “foreground” or subject.
Step 2: Generate a Matte (the Layer Mask)
The software builds a black-and-white map called a matte, sometimes called an alpha channel or key mask.
White pixels in the matte mean “keep this” (subject), black pixels mean “throw this out” (green screen), and gray pixels mean “partial transparency,” which lets soft edges like hair and shadows blend naturally.
This matte is what makes hair detail, smoke, and motion blur look believable instead of choppy.
Step 3: Composite the New Background
With a clean matte, the editor stacks a chosen replacement image or video underneath the original footage.
Where the matte is black, the green disappears and the new background shows through. Where the matte is white, the subject stays exactly as filmed.
Software like Adobe After Effects, DaVinci Resolve, and even CapCut can do this compositing in near real time.
Step 4: Color Correct and Suppress Spill
Even good keying leaves traces of green light bouncing onto your subject (called spill or green spill). A final pass with color correction tools cleans up fringes around hair, eyebrows, and shoulders.
Spill suppression tools desaturate the green channel on edges where it doesn’t belong, leaving skin tones looking natural.
After these four stages finish, you get the finished shot: your subject placed inside a world that never existed outside a hard drive.
Why Green (and Not Blue or Red) Is Used for Screens
Green screens are green because the human skin tone has very little green in it, while digital camera sensors capture the green channel with much higher resolution than red or blue, giving editors a cleaner key with less edge fringing.
Camera sensors use a Bayer pattern, which dedicates roughly twice as many pixels to green as to red or blue because our eyes are most sensitive to green light. That extra detail makes the green channel the easiest one to isolate cleanly.
Skin tones, on the other hand, are dominated by red and yellow. They sit far away from pure green on the color wheel, so the software can separate them with very simple math.
A few other reasons reinforce the choice:
Green cloth and paint are cheaper than blue cloth or specialty paints.
Green LEDs and lighting gels are inexpensive and widely available.
A bright green reads as vibrant and slightly unnatural, which actually helps the keyer lock onto it.
Most clothing, hair, and makeup rarely matches pure green, so accidental clashes are unlikely.
When Blue Screens Are Preferred
Blue screens are used when the subject wears green clothing, has green eyes that won’t be covered, or scenes are filmed at night with low green-light sensitivity.
Digital night shoots often switch to blue because digital cameras produce more visible noise in the green channel at high ISO. Sports broadcasts also use blue screens for sideline graphics when players wear green uniforms.
Otherwise, green is the default for good reason.
Essential Equipment for a Green Screen Setup
A basic green screen setup needs four things: a backdrop, two matched lights, a camera capable of clean video, and keying software. Everything else is refinement.
The backdrop is where most people start, and you have more options than you might think.
Collapsible pop-up screens (5×6 ft, around $40 to $150) work well in small rooms.
Muslin or cotton fabric rolls (8 to 12 ft wide, around $80 to $300) are flat and portable.
Painted walls or pull-up roller screens work for permanent studios.
Green paper rolls are common in schools because they can be cut and discarded.
Lighting is what makes or breaks a key. Two soft, matched lights pointed at the backdrop reduce wrinkles and keep the color flat across the entire surface.
Your subject then gets its own key light, fill light, and backlight to separate from the background and create depth.
Cameras vary widely. A modern smartphone in 4K can key quite well on its own, while a cinema camera gives you more latitude for color grading later.
Software comes last but matters most. Even the cleanest green screen footage looks bad inside weak keying software.
Step-by-Step: How to Set Up Your Green Screen
To set up a green screen properly, light the backdrop first with two matched lights, position the subject four to eight feet in front, then light the subject separately and key the footage through chroma software.
I’ve rebuilt this setup in three different rooms and on dozens of client shoots. The order of operations matters because each step fixes the problems created by the previous one.
Step 1: Hang or Mount the Backdrop
Pull the fabric tight or use a rigid roller screen so there are no wrinkles, which cast shadows that confuse the keyer.
Wrinkles don’t look like wrinkles to software; they look like darker green spots that the algorithm won’t fully remove.
Step 2: Light the Screen Evenly
Place two lights at 45-degree angles aimed at the backdrop, both about four to six feet away from the cloth.
Adjust them until the green looks flat and even across the entire surface. A handheld monitor with a waveform view helps if you have one.
The goal is the same exact green hex value across the full screen, including the floor if you want bottomless composites.
Step 3: Place the Subject With Spacing
Stand or seat the subject roughly four to eight feet in front of the screen. This spacing prevents shadows from landing on the backdrop and reduces green spill bouncing onto shoulders and hair.
Closer than three feet, the spill becomes nearly impossible to fix in post.
Step 4: Light the Subject Independently
Use a separate key light (the main light on the face), fill light (softer opposite-side light), and backlight or rim light (behind the subject) to separate the person from the background.
Match the new background’s light direction later in software if you want realism.
Step 5: Shoot, Then Key in Software
Record clean footage, ideally in a flat or log color profile, then import into your editor and apply the chroma key tool.
Use the eyedropper to sample the green, then refine the matte with edge softness, spill suppression, and final color correction.
Most beginners get acceptable results on the first try when the lighting is right. Bad lighting can never be fully rescued in software.
Common Green Screen Mistakes and How to Avoid Them
The most common green screen mistakes are uneven lighting, green spill on the subject, and wardrobes that match the backdrop, all of which create patches that software cannot properly key out.
These issues come up constantly in forum threads and Reddit posts. I’ve hit every one of them in my own setups.
Uneven Lighting and Dark Spots
If the green screen has bright spots and dark spots, some pixels don’t match the key color and stay visible in the final image as ghosted green blobs.
Fix it by moving lights closer, using two matched fixtures instead of one, and checking the screen with the camera’s histogram.
Green Spill on the Subject
Green spill is the green tint that bounces off the screen onto hair, shoulders, and edges of the face.
Fix it by adding more distance between subject and backdrop, using a backlight to push light forward, and applying spill suppression in your keyer.
Subject Too Close to the Screen
If the subject stands less than three feet from the backdrop, the screen color reflects strongly onto them and shadows fall directly behind, creating matte artifacts.
Fix it by moving the subject further away or lighting the backdrop from below where shadows won’t hit it.
Clothing That Matches the Screen
Wearing green clothing creates the famous “hole in the body” effect where parts of the subject get keyed out along with the background.
Fix it by banning green wardrobes before filming. Green graphic tees, ties, scarves, and even subtle olive jackets all cause problems.
Reflections in Glasses and Chrome
Glasses, watches, eyeglasses, and metallic objects reflect the green screen and leave green patches that the keyer reads as foreground.
Fix it with anti-reflective spray, repositioning the lights, or simply removing reflective items before filming.
Software Tools That Key Out a Green Screen
Most chroma key software today uses the same underlying algorithm, ranging from free mobile apps to professional compositing suites costing thousands.
Choosing one mostly depends on what you already use and how much control you need over the matte.
Pro and Prosumer Tools
Adobe After Effects and DaVinci Resolve are the industry standards, with dedicated keying tools like Keylight, Primatte, and the built-in Delta Keyer offering precise control over edge softness, color spill, and matte refinement.
These are what Hollywood productions use daily.
Mid-Tier Video Editors
Adobe Premiere Pro, Final Cut Pro, and Vegas Pro include capable chroma key effects that handle most YouTube and corporate work without needing a dedicated compositing app.
For most users this is the sweet spot of price and power.
Beginner and Streaming Tools
OBS Studio for streamers, CapCut for mobile editors, and built-in webcam tools in Zoom, Teams, and Google Meet key out green screens with one click.
These are surprisingly capable today and a great way to start before investing in pro software.
Real-World Applications: Where You See Green Screens at Work
Green screens appear in nearly every modern video production, from Hollywood blockbusters to school morning announcements, because they let creators place subjects in any environment without traveling.
Once you understand the technique, you start spotting it everywhere.
Movies and Streaming Shows
Every Marvel film, Star Wars scene, and HBO sci-fi shot uses some chroma keying, often for background extensions of distant worlds, magical effects, or impossible camera moves.
Original shots are combined with digital sets, CGI, and matte paintings during compositing.
Weather Reports and News Broadcasts
Your local weatherman stands in front of an LED green wall while the on-screen map appears behind. The same technology powers green screen walls in major news studios.
This is probably the first place most viewers consciously noticed the effect.
YouTube, TikTok, and Live Streaming
Creators key out green screens to place themselves inside gameplay, talking head segments, or virtual studios for daily content.
Many use lightweight ring lights and collapsible green screens in their homes for professional-looking results.
Photography and Product Shots
Product photographers remove green-painted backgrounds to place items in lifestyle scenes or pure white catalog shots.
Even still images pass through the same chroma keying process, sometimes in Photoshop’s “Select Color Range” tool.
Green Screen Tips for Beginners, Streamers, and Pros
The best green screen setup depends on your budget, space, and skill level, and small adjustments in lighting and distance matter more than expensive gear.
I’ve grouped the most useful tips by experience level so you can jump to what applies to you.
Beginner DIY Setups
If you’re just starting out, prioritize a tight fabric backdrop and two matched soft lights over fancy software. Even a $60 setup can look professional.
Use a $40 collapsible screen pulled tight between two stands or a wall mount.
Paint a wall with chroma key green paint if you don’t want fabric. Many hardware stores carry it.
Skip expensive cinema lights and use two cheap LED panels at matching brightness.
Film near a window for free soft light on your subject during daytime shoots.
Use CapCut or OBS to test your key in seconds before investing in pro software.
Streamer-Specific Advice
Live streamers need consistent lighting and minimal lag, since you can’t re-key footage in real time.
Use Elgato Key Light or similar app-controlled LEDs you can dial in from your PC.
Set your webcam or DSLR to a flat or log picture profile for cleaner keying.
Keep OBS Studio updated, as its Chroma Key filter has improved dramatically each year.
Match the lighting temperature of your subject to the virtual background’s mood.
Watch your frame edges with a preview stream before going live.
Professional Tips
If you’re producing paid work or film-grade content, the same fundamentals matter even more because clients notice every flaw.
Use waveforms and vectorscopes to verify your screen is perfectly flat and on-color.
Calibrate your camera with a color chart like the X-Rite ColorChecker before each shoot.
Reserve 4 to 8 hours of post-production for a typical one-hour shoot to handle spill and color matching.
Combine multiple light sources with flags and bounce cards to eliminate hot spots.
Track rotoscoping fixes for hair detail using After Effects’ Refine Edge tool.
Render previews on multiple devices because monitors lie and clients notice what you miss.
FAQs
What is the science behind a green screen?
Green screens rely on color theory and digital imaging. Software scans every pixel in a video frame, identifies those matching a chosen green hue, and converts them to transparent so a new background can show through. Human skin tones contain little green, and camera sensors capture more green detail than red or blue, which makes separating subject from screen fast and clean.
Why are green screens always green?
Green is preferred because it sits opposite skin tones on the color wheel, making subjects easy to separate, and digital camera sensors capture more detail in the green channel than in red or blue. The result is cleaner edges, fewer color fringes, and cheaper materials than blue or other alternatives.
How does a green screen know what is behind it?
The screen itself does not know anything. Software after filming scans each frame, finds pixels matching the screen color, and replaces them with pixels from a chosen background image or video. The replacement happens inside the editing or streaming software, not on the physical set.
What are the disadvantages of green screen?
The main disadvantages are uneven lighting, green spill onto the subject, reflections in glasses and chrome, and wardrobe clashes when the subject wears green. These problems require careful lighting, wardrobe planning, or expensive fixes in post-production to overcome.
How exactly does green screen work for streaming?
For streaming, software like OBS Studio keys the green screen in real time from a webcam or capture card, replacing it with a virtual background selected in the application. The streamer still needs even lighting and a clean backdrop, but the keying happens on the fly rather than in later editing.
Final Thoughts
Now you know how green screen works: software identifies a chosen color, masks it out, and composites another scene behind your subject through a four-stage chroma keying process.
Start with a tight green backdrop, two matched lights, and a free trial of OBS or CapCut, then iterate from there. The technology is accessible, the science is straightforward, and the results come quickly once lighting is correct.